Monday, December 16, 2013

RAINBOW SPONGE CAKE


Wishing every reader a BLESSED CHRISTMAS AND HAPPY NEW YEAR 

This will be my last post for 2013. I will be taking a short break till 2014. 

It is less than 2 week now before my son's wedding dinner and suddenly there seems to be hundred of little details to look into! One of them was to test and bake some cupcakes and a cake for the center-piece of my cupcake tower. 
I did a Red Velvet Cake for my nephew's wedding and this time I decided on a Rainbow Cake.
Tested this recipe from the Flavours Magazine.  It is a basic sponge cake recipe.   


The food colour is to be added separately to the cake batter and to be divided and bake separately.  As I have only  one 6" cake tin, decided to put them together.  I used only 3 colours and this is the way of layering the cake batter.  

A spoonful of the first colour is ladled into the centre of the cake tin.   Add another spoonful of 2nd colour into the centre of the first colour batter and continue till all the cake batter is used up.

 Bake the sponge cake at 180C for around 15 minutes till golden brown.
The colourful hues of the cake really stand out pretty well.  Though  the cake texture is really soft and fluffy and eggy flavour rather strong, I find it to be a bit plain and ordinary for the occasion.
It will still be a rainbow cake and I am looking into several possibilities.  


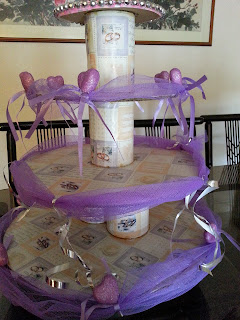
Meanwhile over the weekend I took  out the cupcake tower and revamp it for the Big Day!. 

Enjoy your holidays. 

Thursday, December 12, 2013

PURPLE VS GREEN

13/12/2013


I will be making my presence felt in KLIA this week- no... I am not  travelling to any exotic places for year end holidays.  Went there yesterday to pick up Sarah and following weekend looking forward to see my son and new daughter-in-law!. 

I miss her dearly.  Very very happy that she can make it back for her brother's wedding. 

Welsh cakes and Orange Marmalade - all the way from Cardiff...perfect for tea-time... delighting the tastebuds as well as touching my heart!


She said she tasted the most delicious cuppa of coffee at one small cafe and bought a packet of the coffee beans for me... how thoughtful. More Irish chocolates - Bailey's.  

Have a great weekend.

Monday, December 9, 2013

GONE NUTS OVER THE WEEKEND


I have been reading about a group of bloggers baking the Italian Almond Tart.   Reading the recipe, I found myself thinking... "this is my type of tart....must make this". There are at least 3 parts of doing this tart.  First prepare the almond paste -mixing grounded almonds with egg white and icing sugar to form a dough which  is later incorporated into the batter. Then to prepare a sweet tart pastry and blind-baking this beforehand. Finally the filing itself.  The reviews of this tart were very promising ie easy to assembly and from the photos also looked very tempting. Check out the post by Kitchen Flavours.  
  
And I remember another tart which I have bookmarked- Bakewell Tart- a tart which is very popular in United Kingdom.  This is similar to the Italian Almond Tart except there is no need for any almond paste.  I follow the recipe taken from The BBC Good Food Mazagine June 2013.  It is a lighter and healthy version of the original recipe. 

Ingredients: 50 gm ground almonds, 50 gm cornmeal(yes, can finally make use of  the corn flour), 50gm golden caster sugar (I use brown sugar); 1/2 teasp baking powder, 2 eggs, 100 gm yogurt; 2 tablesp rapeseed oil (I used corn oil) and almond extract (I used vanilla extract). The jam is for spreading on the pastry base of the tart.  

    The recipe use shop bought short crust pastry.   I decided to make the pate brisee- sweet pastry. Pulse together in the food processor 200 gm flour, 90 gm sugar, 1/4 tsp salt and 125 gm cold butter.  Slowly add in 1 egg yolk, 2 tbsp iced water and 1 tsp vanilla extract.


Gather up the dough and chill for around 30 minutes.

 I used an 8inch pie pan with removable base.  Roll out pastry  and carefully mould into the pan.  Prick base with fork and place to chill for another 15 minutes.

Blind-bake the the tart shell at 180C for around 15 minutes. This is my "weights" whenever  blind-baking is require- unused very old rice.

Remove the parchment paper with the weights and bake for further 15 minutes till golden brown. Cool and spread pastry base with jam  (which I have forgotten to do so, but it still taste good).  

Prepare the filling: Mix almonds, cornmeal, sugar  and baking powder together. Mix the yogurt with eggs and vanilla extract.  Tip egg mixture into the dry ingredients and gently stir together till everything is combined- don't overmix. 
Pour almond filling into pastry and sprinkle some flake almonds on top (next time must toss more- it gives a nice cruchy bite).  

Bake at 180C for 25-30 minutes till top is golden brown. 
The recipe states to bruch the top with glaze -icing sugar with water which I omitted.
Cool completely before cutting... it is delicious! Defnitely I will make this again.

I decided to make an apple galette with the remaining pastry. 
I used 1 Granny Smith and 1 Fuji apple for this small galette.  Peel, core and slice thinly.  Squeeze of lemon juice and toss in some cinnamon powder, brown sugar and cornstarch.     

 Roll out the leftover pastry on the foil and arrange the apple slices around the pastry leaving an inch margin.  Fold in the pastry towards to centre to enclose the apples as shown above. Brush with beated egg and bake at 200C for around 25-30 minutes.  

 Rustic, hot,  aromatic and yummy apple galette.  I will keep this for myself .....

 I found 3 small packets of walnuts in the freezer. So it got to be Walnut Coffee Cupcakes.  Nice moist crumbs and intense coffee flavour.  As I have reduced the sugar dramatically and as I did not topped it with any frosting, it tasted a slightly  bitter.  A coffee lover would  not find any fault with these but children  may find it too strong coffee taste, best to frost it with a coffee buttercream for them.
  
Last but not least, how about this jar of Almonds Cookies?   Just tested this cookie for the coming Chinese New Year.  Recipe again taken from the Bake Along group.   I added 2 tablespoons of almonds nibs as well as a teaspoon of vanilla essence to the dough before shaping.  Next time, I would shape the cookie thinly and maybe add almond extract instead but it certainly has a nice crunch and nutty flavour.  

Have a great week.

Monday, December 2, 2013

OODLES OF NOODLES

Let me see, I have cooked Hokkien-style Fried Mee, "Singapore-style" Fried Meehoon ("sing chow mee"), Fried "Loh shui fun";  the simple Vegetarian Fried Meehoon and even Shanghai-style mee-sua with dried prawns and spring onions and last but not least not forgetting our family favourite- oddles of noodles served with our family minced meat sauce in soup----all except Cantonese-style Fried Noodles.  

I like the robust dark soya sauce and the pieces of lard in Hokkien-style fried mee (my favourite);  the sweetness of the onions, tomatoes and char siew in the Singapore fried meehoon, the smooth and chewniess of loh shui fun; the rich aroma of the rice wine in the dried prawns and spring onion with the Shanghai Mee sua and the assortment of the vegetables in the vegetarian fried meehoon.  

Most of the Cantonese fried mee that I had eaten tend to be bland and the sauce to be a thick slurry of cornstarch. Oh, not that I dislike the dish wholly, I do find the crisp and slightly blacken fried meehoon the best portion of the dish though.  

When I saw the recipe on Kitchen Flavours blog - thai-style fried noodles, I immediately think of the Cantonese Style Fried Noodles aka "wat tan hor" and here's my version. 

Ingredients:  kway teow, choy sum (spinach); thinly sliced pork (marinated with soya sauce, cornstarch, sesame oil and pepper), spring onions - white part diced and green parts cut into length, sliced ginger eggs, minced garlic and mix the seasoning together (so that you can adjust the taste here as it will be a very quick stir fry)- soya sauce, oyster sauce, sugar and pepper and water.

Kitchen Flavours give us a good tip- that is to separate (using your hands) the kway teow with some soya sauce before frying them.  This way the kway teow is seasoned and they won't lump together when cooked.
I pan-fry the kway teow till slightly golden brown and fragrant. Dish up and set aside.
 
Heat oil, add minced garlic and white of spring onions till fragrant,  add the pork.
Add sliced ginger,spring onions and spinach. Splash some rice wine and add some water.
Bring to boil and add in the beaten eggs and immediately off the heat and spoon sauce over the kway teow.

Serve immediately.   Nothing beats homecooked.  Simply yummilicious!
Saturday morning brunch for Esther before she goes to work and for me before I started my spring cleaning over the weekend.

Yes spring cleaning already began for me over the weekend...... got to get the house bright and clean for Jeremy's wedding as well as the Chinese New Year which falls on 31/1/2014!

On Sunday, it was another one-pot meals... ABC soup served with elbows macaroni- a replicate of the macaroni and ham in chicken soup that we had in HongKong. (sorry forgot to take photos ..again).  

Enjoy.